One-Legged Chaturanga to Upward Facing Dog
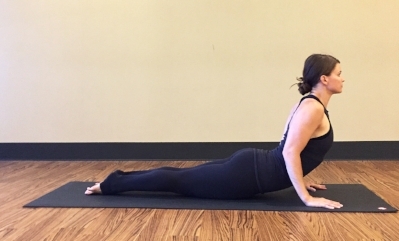
When you actually breakdown the word Chaturanga Dandasana it means Four-Limbed Staff Pose. Chatur meaning the number four and Danda meaning staff as in a stick or rod. So next time you do Chaturanga, and any variation on it, consider the idea of a staff. Ideally when moving from high to low plank your spine stays in a neutral, long position. Not until you transition into Upward Facing Dog or Cobra does the body move into spinal extension, a backbend.
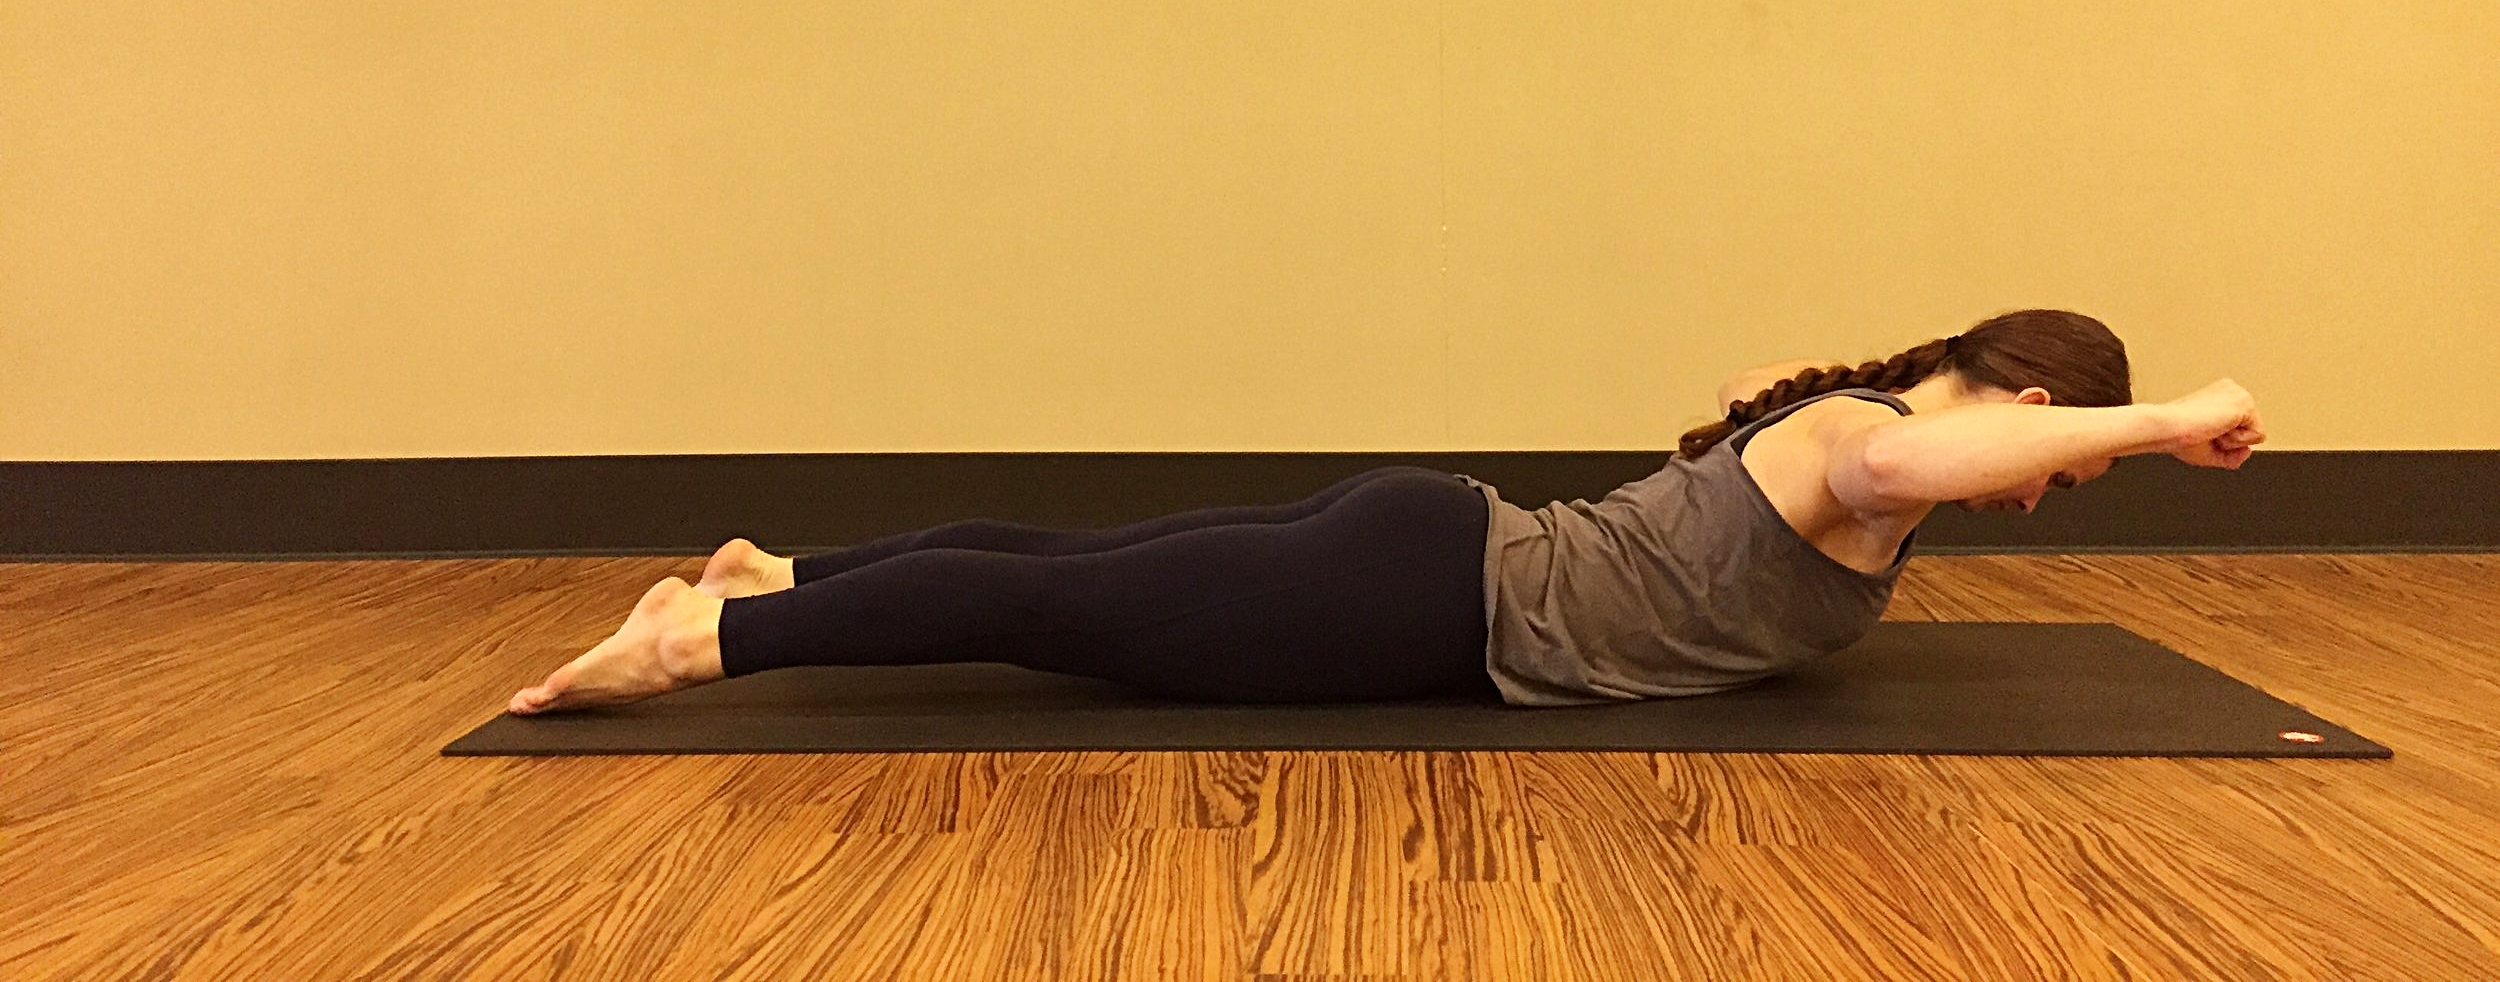
This is even true when you add the flourish of lifting a leg in Chaturanga. When you elevate one leg in your high to low plank, your body has to work even harder to keep your ribs drawn in and your abdominals active. Your body naturally wants to compensate by moving into a slight backbend the moment one leg is lifted especially if your leg is lifted higher than hip height.
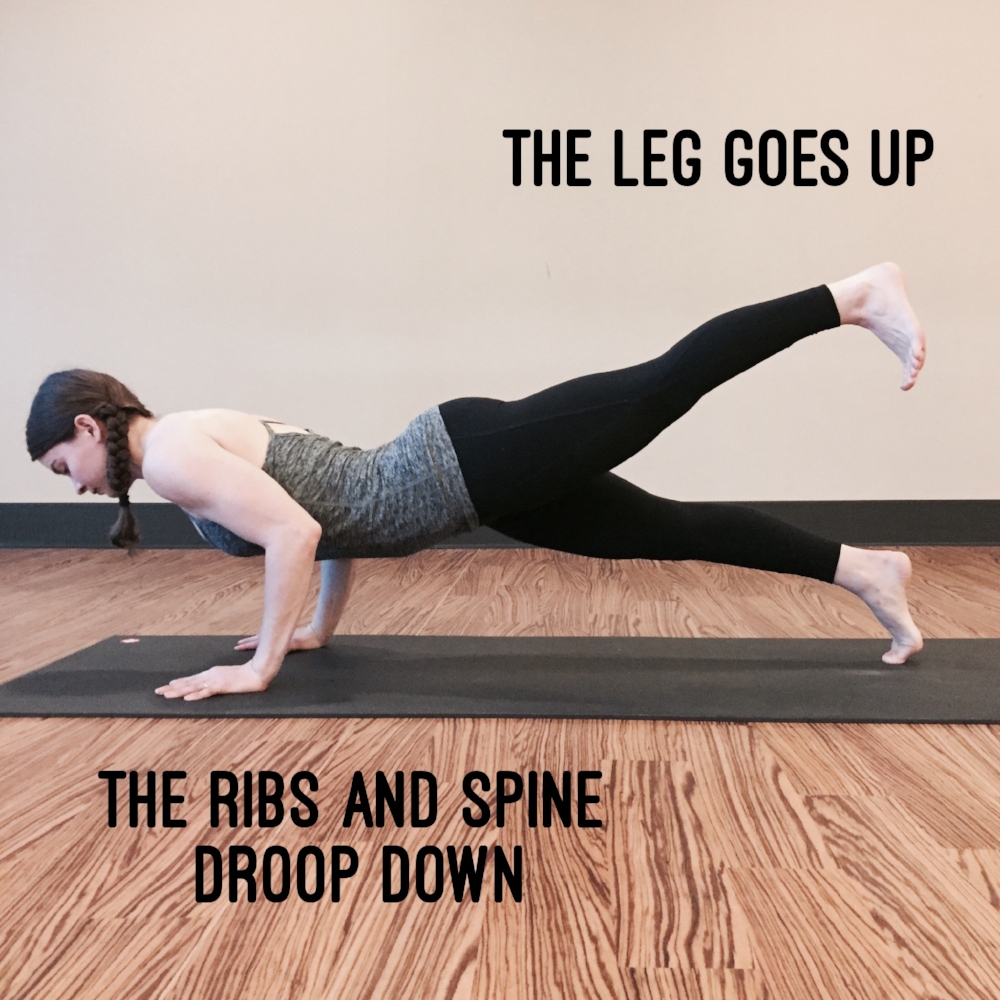
Less than ideal One-Legged Chaturanga
The image above isn't as dramatic as it could be, but as you can see the spine and pelvis are quick to react once the leg is lifted. Eventually the leg elevation could affect the shoulder joints and cause the heads of the shoulders to drop and roll forward which makes the transition into Upward Facing Dog more strenuous than it needs to be.
So how do you combat droopy ribs and spine in your Chaturanga Dandasana and its different variations? Draw your frontal hip points toward your ribs to active your abdominal core and glutes. Containing your abdominals and getting your glutes to fire will help balance the relationship between your pelvis and spine and keep you in that staff-like position. From there it's a smooth, efficient transition into your Upward Facing Dog.
Remember Chaturanga is not a backbend. Upward Facing Dog IS a backbend. Let the two postures be their own thing. Once Chaturanga has had its moment to shine and settle, then transition into your backbend.
Happy practicing, yogis!